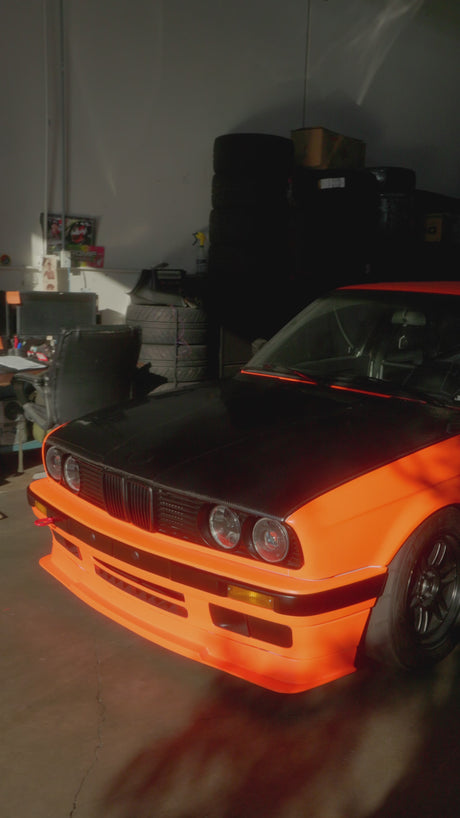
E30 DOHC Swap Basics - M50, M52, M52 and S50
So it has come to our attention that the legendary E30 DOHC wiki page is down and gone forever. So instead of letting it die, we have rehosted a copy of this guide. Keep in mind, this was the original work of the e30dohc-swap.wikia website that is no longer hosted. All credit goes to them. We have been adding to it for years now so it stays current. There is a wealth of information here that will help future e30 owners. Enjoy!
What Are the Required Parts
- M/S5x complete longblock with accessories
- M/S5x wiring harness
- A smaller diameter brake booster (see Brake Booster section)
- E34 525i oil pan, dipstick tube, dipstick, oil pickup tube
- E34 throttle cable
- E36 engine mount arms
- E28 535i or M5 engine mounts
- custom exhaust, although it may be possible to use a combination of E30 and E36 parts
- possibly an electric thermo-fan
- We recommend always using a little blue Loctite make sure nothing on your e30 gets loose! This is the version we recommend: https://amzn.to/3MWIUlO
Major components
You can use any M50, S50, M52, or S52 for this swap. You can also use the E30 transmissions (Getrag 240 or 260, both 5-speed) or any E36 transmission (Getrag 250 5-speed, ZF 320 5-speed, Euro 6-speed). You can use an E46 M3 6-speed transmission as well.
What you use as a transmission will determine which driveshaft and differential ratio you can use.
Engine
The question is, what engine should you use for the swap? That depends a lot on what your budget is. This section will discuss the potential advantages, pitfalls, and expected maximum power you can expect from each of the engines.
OBD-I vs OBD-II
The M52 and S52 engines are OBD-II, which have additional challenges to overcome (such as EWS). Whether OBD-I or OBD-II is better is a controversial topic which has led to many arguments (such as here). To overcome the OBD-II challenges, there are 3 options:
- convert the M/S52 to use OBD-I, how-to here
- flash the OBD-II DME to remove EWS etc details here, note that the DME from an automatic E36 can be converted to "manual transmission mode" when it is reflashed
- transplant all the additional components (such as key chip, ring antenna, Tx/Rx module, EWS module and matching ECU) into the E30, some info here
On M50 engines, red label DMEs do not have EWS (engine immobiliser). Apparently silver label M50 DMEs older than 12/1994 also do not have EWS.
M50B25
The M50B25 was BMW's earliest DOHC inline six and the direct successor to the M20. Both intake and exhaust cams had fixed timing. That is, it did not have VANOS.
The head is different from most other M/S5x variants in that it has double valve springs, 7 mm valve stems, and the cam durations were longer than the later engines.
M50B25 TU
The next iteration of the M50, the M50B25 TU (technical update), added variable valve timing (VANOS), to the front of the cylinder head. Some people prefer the extra torque provided by vanos, others prefer the simplicity of the earlier non-vanos engine.
Popular upgrades for the M50B25 are re-tuning for premium fuel and installing S50 US cams. With these upgrades, maximum power output is reported to be close to 200 rwhp. This would require a custom tune, and an optimized exhaust system.
S50B30 US
The S50B30 US was found in the North American 1995 M3. Displacing 3.0 liters, it puts out 240hp.
Popular upgrades to the S50B30 US are:
- Software for premium fuel
- European 3.5" air flow meter (HFM), 24 lb injectors
- European 3.5" air flow meter (HFM), 24 lb injectors, Schrick cams
M52B28
The M52B28 produces 190 hp (similar to M50 engines), however torque is increased to 210 lb-ft. Some M52 engines are all-alloy, therefore lighter than M50 and S50 engines.
The M52 can be converted to OBD-I by using an OBD-I harness, cam position sensor, crank position sensor, knock sensors, intake manifold, throttle body, and 413/506 DME. Also, there is a VANOS actuator extension cable available, so you can reuse the M52 VANOS electric cylinder.
The engine comes with pink-top Bosch fuel injectors, rated at 21.5 lbs/hr.
A popular upgrade for the M52 engine is S50US or S52US cams, which are a direct drop in. You can achieve above 200 rwhp with the M3 cams assuming a proper tune (proof?).
S52B32
As per the M52, the S52B32 is an OBD-II engine. The S52 is a lightly modified M52 which was used in the North American 3.2L M3 and produces 240 hp.
The upgrade path is similar to the S50US. Euro HFM, 24 lb/hr injectors, and Schrick cams. With these upgrades, most people will see 245-255 whp.
Transmission
Both the E30 and E36 transmissions can be used with minimal modifications. The transmission you use will determine what transmission mounts you will use, and also the rear differential ratio you should use.
E30 Getrag 240
Use E36 325i driveshaft, stock E30 crossmember, stock E30 mounts. This gearbox is was used for 4-cylinder engines, therefore it has a lower torque rating than the other transmissions. Opinions vary regarding its ability to handle additional torque.
E30 Getrag 260
Use E30 drivestaft. Gearbox will be rotated approx 10°, therefore crossmember and shifter modifications are needed (see below).
| 3.83 | 1st |
| 2.20 | 2nd |
| 1.40 | 3rd |
| 1.00 | 4th |
| 0.81 | 5th |
E36 Getrag 250
Stock E30 manual transmission crossmember, stock transmission mounts (E21 320i mounts are a possible upgrade).
E36 ZF 310/320
Stock E30 manual transmission crossmember, stock transmission mounts (E21 320i mounts are a possible upgrade).
| 4.21 | 1st |
| 2.49 | 2nd |
| 1.66 | 3rd |
| 1.24 | 4th |
| 1.00 | 5th |
Transmission Crossmember
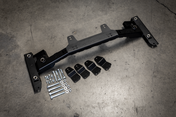
If you use an E36 transmission (Getrag 250, ZF310, ZF320) or the E30 Getrag 240, you can use the stock manual E30 transmission cross-member. The the E30 M3 aluminum transmission crossmember will not bolt up correctly.
If you use the E30 Getrag 260, you generally cannot use the stock transmission crossmember without modification. When bolted up to the M5x, the transmission will be rotated around 10°. As such, the mounting tabs will no longer line up correctly. In addition, the shifter linkage will need to be cut and rotated to compensate for the 10° gearbox rotation.
It is claimed (proof?) that M20 engine mounts and a regular E30 transmission mount can be used, although it is unclear what modifications would be needed to make this work.
Differential
E36 5-speed transmissions all have 1:1 5th gears. A 3.23 differential with E36 transmissions is found to give good gearing for the street. For taller gearing (less revs), use a 3.07 viscous LSD from a Z3 or a 2.93 LSD from an eta. For shorter gearing (more revs), use a 3.46 LSD from an automatic E28 528e or an old E23 7-series.
E30 5-speed transmissions have an overdriven 5th gear, at 0.81. Therefore a 3.73 LSD found in an E30 325is is found to give good gearing for the street. For shorter gearing, us a 4.10 LSD from an E30 M3 or E30 automatic 325is.
Driveshaft
Driveshafts come in many flavors. The choice of which driveshaft you should use boils down to availability, ingenuity, and what transmission you are using, as the transmission output flange (the triangular flange at the rear of a transmission) differs in size between cars.
The easiest solution is use the driveshaft that came with the transmission on the car you are using.
But, if you want to get down and dirty because you want to save a few bucks, or a driveshaft is hard to find for some reason, here is a summary of what should go into selecting the proper driveshaft:
- Determine what transmission you have.
- Work out the size of the output flange (the triangular flange on the rear of the transmission). It is either 78mm or 96mm bolt circle diameter (BCD). You could change the transmission output flange if you have a 30 mm thinwall socket.
- From the output flange size, you choose the appropriate driveshaft.
Output flanges:
- The Getrag 240 (as found in the E30 318is) has a 78 mm BCD output flange.
- The Getrag 260 has a 78 mm BCD output flange in ALL 325i, early (<6/86) 325e
- The Getrag 260 has a 96 mm BCD output flange on late 325e (6/86+)
- The Getrag 250 has a 78 mm BCD output flange
- The ZF 310 and 320 both have a 96 mm BCD output flange
Driveshaft bolt holes:
- All E36 driveshafts have 12 mm bolt holes.
- The E30 M3 driveshaft has 12 mm bolt holes.
- All non-M E30 driveshafts have 10 mm bolt holes.
- The E30 M3, 6/86+ E30 325e, 96+ E36 M3, 96+ E36 328i, and E36 328is have 96 mm bolt circle diameter (BCD) input flanges on their driveshafts.
- The E30 325i, <6/86 325e, and E36 325i have 78 mm bolt circle diameter input flanges on their driveshafts.
Clutch, flywheel and starter
Use the matching clutch, flywheel and starter for your transmission. However, the E36 transmissions can be used with an M20 clutch (in fact, some E36 owners installed the M20 clutch as an "upgrade").
The M20 Sachs clutch can hold over 210 lb-ft. Be careful with organic clutches, some have no modulation (eg a "button clutch"), which are a hassle for street cars (awful for parking and stop-start traffic).
The M20 flywheel needs to be machined to avoid fouling an engine block bolt.
Wiring Adapter
- TreeHouseRacing Adapter
- For $400 you can get a pre-wired adapter to connect a DOHC engine to the E30 chassis.
- treehouseracing.com
- Or do the wiring for yourself
- See wiring diagram.
Brake Booster Modification
Due to the shape of the M/S5x intake manifold, there is a clash with the stock brake booster.
See Brake Booster section.
Cooling system
Engine fan
In many cases, the standard E30 radiator fan will not fit. An electric thermo-fan mounted in front of the radiator should be considered, to avoid overheating in traffic. The aircon condensor fan is too small to cool the engine, and should not be used for this purpose.
Radiator
A combination of E30 and E36 hoses are needed.
While not strictly necessary for the DOHC swap, some people choose to use a smaller M42 radiator to free up space.
Air conditioning
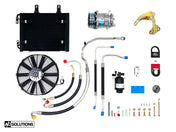
It is possible to get the airconditioning working using the M52 condensor with the E30 system. However this is a fiddly job and requires custom fittings, so many people have put airconditioning in the "too hard" basket. Do not leave an aircon compressor exposed to air, this could result in a rebuild being needed.
Power steering
A hybrid of E30 and E36 hoses are needed to get the power steering working.
Check panel lights
The only light which is affected by the engine swap is the oil level. The M52 does not have an equivalent oil level sensor which can be used, however some electronics gurus have been able to wire in a sensor. The light can be disabled by putting a specific resistor in the circuit.
Airbox
The M/S5x airbox won't fit. A pod filter is the simplest solution. Cars with ABS have very limited choice of airbox due to the limited space.
For an OEM look, the E34 535i airbox is popular. It is TBD whether the 535i airbox will fit on a car with both ABS and a 6-cylinder radiator.
Right hand drive cars
The biggest issue are the headers, which require modification to clear the steering column. Be aware that even if the engine clears the headers while stationary, there may still be a clash in left-hand cornering when the engine is leaning in its mounts. If the steering yoke clashes with the headers, it can lock the steering.
LHD and RHD throttle cables are different, don't order the wrong one!
It is possible that RHD cars may also have complications regarding the brake booster, due to the linkage across the cabin.
Extracting the Old Engine
Extracting the old engine is simple in concept, but sometimes fairly difficult in execution. Here is an outline of what needs to happen:
- Disconnect battery
- Disconnect DME from wiring harness in the glovebox. Pull the wiring harness through the firewall. The DME connector is sometimes balky, but it does fit through the hole in the firewall.
- Disconnect engine ground cable on passenger side frame rail
- Remove exhaust system at downpipe
- Remove heatshielding then disconnect driveshaft
- Remove AC lines
- Remove upper and lower coolant hoses, remove radiator
- Remove hoses leading to heater core
- Remove vacuum line leading to brake booster
- Unbolt the little gas shocks that are attached to the engine, there located just near the engine mounts(on both sides)
- Remove engine
Preparing the Engine Compartment for the M/S5X
After you've extracted the engine, now's a good time to clean it up!
You can power wash the bay, or you can use a degreaser and a hose to remove the gunk that's accumulated in your engine bay. If the car you have is in rough shape, you might have to remove rust and repaint the engine bay.
Preparing the Engine for the Swap
So, you've probably bought a salvage yard engine. It might be complete if you're lucky, but it might not even have a wiring harness. This part of the guide will help you prepare the engine to drop it into your chassis.
The best way to work on an engine is to have it in an engine stand. You can buy an engine stand from your local automotive parts store (for example, Advance Auto, Kragen, Pep Boys). You will also need an engine hoist to lift the engine into the engine stand. Get a stand with four wheels and a wide base. No sense in getting a rickety stand and having your engine fall on the floor.
Installing the E34 Oil Pan
In order to clear the front subframe, you will need to use an E34 525i oil pan since this relocates the sump in front of the subframe. If your donor engine is from an E34 525i, you don't have to do anything. For all other M/S5x variants, you will need to swap to the 525i oil pan.
The swap will require
- E34 525i oil pan 11131740346
- oil sump gasket 11411703947
- oil sump (suction tube) 11411748150
- dipstick tube 11431738169
- and dipstick 11431720875
- new dipstick o-ring 11431287541
- a small plate secure the dipstick to the front intake manifold bracket. You'll have to fabricate this yourself.
For an M52, the E34 dipstick will need to be modified to accept the different diameter crankcase vent tube.
The actual removal and replacement of the oil pan is quite easy. Remove all of the bolts holding the old oilpan on. You may have to remove the power steering pump in order to get to the bolts in the front.
At the same time, it's easiest to take care of the oil pump nut. The nut secures the oil pump gear to the crank, and should the nut back off and allow the gear to fall off the pump, you will experience an immediate loss of oil pressure.
I'm uncertain how prevalent the oil pump nut problem is, but you might as well secure it while you have the pan off, and the engine is out of the car. Many people that track or auto-x their cars will secure the oil pump nut.
You can secure it with a drilled oil pump nut and safety wire, with red loctite, or by tack welding the nut to the shaft.
Remove the E36 windage tray that is attached to the block. The new windage tray is in the new oil pan (for an M52, the E34 windage tray will need modification to fit). Break off/remove the supporting bracket for the oil pick up tube. Do NOT use a cutting wheel or a grinder. This will spit metallic particles all over the place, including right into your crankcase.
Install the E34 525 oil suction tube with a new gasket (you may need to remove the oil pump). Torque properly.
Install the oil pan gasket. Put a dab of sealant on the bottom of the block, at the corners of the engine block, where the timing case meets the block in the front, and the rear main seal plate meets the block in the rear.
Install the oil pan. Torque the bolts down snug, but not too snug.
Tightening Torques
Oil pan to engine block (M6 bolt)
  8.8 grade......10 Nm (89 in-lb)
  10.9 grade......12 Nm (106 in-lb)
Oil pump to engine blocket......22 Nm (16 ft-lb)
Oil pump sprocket to oil pump shaft
  (M10x1 left-hand thread).......25 Nm (18 ft-lb)
Engine Maintenance
- spark plugs
- valve cover gasket
- valve cover grommets
- waterpump
- thermostat
- thermostat housing
- pilot bearing
- Replace rear crankshaft oil seal (behind flywheel)
- Replace sump gasket if the sump was removed
Bleeding cooling system with no bleeding screw
Some combinations of engines and cars will leave you without a coolant bleed screw. People have had success with different techniques to get air bubbles out of the cooling system without a bleed screw. One technique is:
- Pour the coolant mix slowly so there would be as least as possible air pockets formed in the process.
- Start the engine with coolant cap off and while under hood, keep the idle at around 2-2.5Krpm for about 15min. Keep checking the temp gauge and coolant level once in a while. Then close the cap and drive the car for a bit and check on the level again. (don't open the cap right after you drove, hot steam at high pressure will scald you [I know, i got 3rd degree burns!]).
- Some people suggested drilling a tiny (1/8") hole in the thermostat (not in the thermostat housing). Drilling a hole in the top of the thermostat will make bleeding A LOT easier. Basically you drill a hole RIGHT where the up arrow is, or on Vernet-brand thermostats, you drill right where they have handily punched a small dot to indicate "up."
Cooler Thermostat Setup
Installing a lower-temperature thermostat ensures a cooler engine. Combine this with a lower temperature aux fan switch to maintain a cool engine.
Note: cooler running engine is not necessarily a good thing. Hotter running engine runs more efficiently, but at the same time there is a point of running too hot. That's why BMW had conducted comprehensive testing to figure out the best compromise in the operating temperature. (88C at least on the US S50). This is of course with the normal "spirited grocery getter" duty. Race applications might benefit from lower temp thermostat. Many people run lower 80C or even 75C thermostats with no visible problems, but they might be compromising the efficiency. (just like people who put higher octane gas in cars that were for 'regular 87' and thinking they go faster / treat their car better) There is a common misconception that lower temp thermostat will increase the cooling capacity of the cooling system, which is obviously not true. Lower temp thermostat will simply open at a lower temp and will "try" to keep the coolant temp at that temperature point. If the capacity of the system cannot maintain this particular temperature point, the engine will overheat just like it will with a higher temp thermostat.
After getting the S52 running in the e30, I noticed that the temperature would settle between the half-way mark and the 3/4 mark on the temperature gage in the cluster.
At first I thought it was because I didn't have a clutch fan on there. Then I realized it would stay there even when driving on the freeway.
The best way to fix this: new thermostat! The part number for the 80 degree Celsius thermostat is 11-53-1-713-040 I believe this is actually the stock E30 thermostat, but it fits the E36 all the same.
This will bring your operating temperature down to just below the middle mark.
I complemented this with a new aux fan switch (part no. 61-31-8-361-787). According to the ETK the switch turns the aux fan on low at 80 degrees Celsius and high at 88 degrees Celsius.
This setup works great. I switched the aux fan wiring so that it turns the fan on high at 80 degrees. With this setup, the temperature stays at or below the middle.
Auxiliary Cooling Fan Thermo-switch Tests
| Model | Connections to test low speed | Connections to test high speed |
|---|---|---|
| 318i, 325, 325e(es) | white terminals jumpered | red terminals jumpered |
| 325i(is), 325i Convertible | black wire jumpered to green/black wire | black/brown wire jumpered to green/black wire |
Adding a SPAL Puller Fan
Wiring the Engine
So, you have a bare engine. Don't freak out, it's not that hard to wire up the engine. Each wiring plug has a rubber protective boot. Pull this boot back and examine the colors of the wires going to each connector. The colors of the wires will tell you which sensor the connector plugs into.
oil pressure sensor BRN/GRN or BRN/GRY
front coolant temperature sensor (ECU) BRN/RED BRN
rear coolant temperature sensor (Gauge Sensor) BRN/YEL BRN/VIO
crank position sensor YEL
cam position sensor YEL RED/WHT BRN/ORG
VANOS solenoid RED/WHT GRN/BLU
knock sensor, 1-3 BLK NCA DME PIN 70
knock sensor, 4-6 BLK NCA DME PIN 69
throttle position sensor (TPS) BRN BRN/BLK RED/YEL
intake air temperature (IAT) sensor BRN GRY
idle control valve (ICV) WHT/YEL RED/WHT WHT/GRN
Evaporative emissions valve BRN RED/WHT
ABS
Some 89+ cars do not have an ABS relay. The power comes from the main relay. Since you removed the main relay with the m20 harness and added a new main relay (via DOHC harness), you will need to power the system.
On the chassis side of C101 (big plug that connects the engine harness to the chassis), pin 20 (red/yellow wire) is ABS. I ran a 14 gauge wire between pin 20 on the engine side of my connector to the Engine Control Module Relay in the E36 engine bay wiring harness. I tapped into the red/white wire (Relay port 87a). This gives power during start/run.
What Maintenance Should I Perform Before Dropping in the M/S5x
- Since the engine will be out inspect/replace the clutch.
- Change differential and transmission oil.
Dropping in the M/S5x
Hooking Everything Up
Driveshaft
With the ZF 320 transmission (97+ M3/328), you can use the M3/328 driveshaft with the E30 Center Shaft Bearing.
FredK r3vlimited.com Post
- This might be a huge "duh" but there is a lot of second-hand info on what driveshafts work. I thought I'd mention my own first-hand experience.
- The short of it: You can use the E36 328i transmission, flex disc, and driveshaft together, but you need to use the E30 center support bearing. You don't have to do anything strange, like exposing more of the splines of the front section. It is just the right length for the job.
- The 328i uses the same transmission as the later model E36 M3, the ZF 320. The E36 328i/is driveshaft (part number 26111227283) fits only when you replace the center bearing and support with an E30 unit. However, you need to use the E36 front (26111226552) and rear dust (26111226553) covers. The circlip (26123648156) is the same.
- As for equivalence to the 97+ M3 driveshaft, I have no idea. In principle it should work fine, because the M3 driveshaft is the same length according to the ETK (1492 mm). I think the M3 guibo is beefier. The bolt circle diameter is the same at 96mm according to the ETK, but the guibo bolts are specified 4mm longer than the 328i bolts.
Transmission Crossmember and Mounts
- If you are using an E36 transmission, you must use the steel Manual transmission crossmember from a regular E30 (325i, 318i, 325e)(P/N 23711176574) , NOT the E30 M3 aluminum transmission crossmember or any automatic E30.
- One suggested upgrade is to use 2 E21 transmission mounts (P/N 23711109173)with Aluminum cups to reduce mount flexing during braking. AKG Motorsports is one vendor who sells the Aluminum Cups.
DME
Use the supporting plate and left and right brackets from a late-model e30 318 (12 14 1 727 498 + 12 14 1 727 490 + 12 14 1 727 500) and the original 4 screws used to mount the M20 DME to mount the new DME to the original location behind the glove box (under the drivers knee bolster on RHD cars).
Heater Core Coolant Hoses
- The "spider" hose connects to the top heater core pipe out of the firewall in the engine bay.
- The coolant hose from the back of the head connects to the bottom heater core pipe out of the firewall in the engine bay.
This step is important, otherwise the heat will not function very well i.e. it gets cold anytime the car is at higher RPMs.
Reverse Lights
Under the shift boot, connect the reverse harness to the switch on the transmission. Solder the green/white from the manual transmission harness to the green/yellow of the body harness. Solder the blue/white from the manual transmission harness to the blue/white of the body harness.
Exhaust
Information derived from the good people at r3vlimited.com.
S52
Bennetts22@aol.com r3vlimited.com post
we heated the back down pipe and bent it in about 1/4in so it would clear the sway bar.. the front down pipe we hade to make a custom pipe off the flange because of the control arm.. So i did dual pipes and made a x pipe right after the down pipe.. (fall-line told me this would make the sound deeper and make more power). So after the x pipe dauls into the stock 2 cats from a m3 e36 and then duals from their into the B&B triflow.. We had to do the exhaust 3 times before doing it this way and getting it right.. now is sounds sweet and nice and low with very little rasp.. the bill was 200 the first time but after redoing it 2 more times the grand total was 400.00 the car sound great!! If you do true dual and no x pipe the car will sound like a 80hp ricer. thats how it was the first time.. the chambers need to mix before the muffler.. so a xpipe / h pipe will give you the great sound and power.. also i used 2.5in pipe
E36 steering rack upgrade
While you are upgrading your car, you might like to swap to a quicker steering rack. See [E36 Steering Rack Swap].
Smog test (for California cars)
See smog.


