Garagistic E30 Adjustable Seat mount Instructions
- Taller side of bracket goes towards front of seat
- Slider handle is always closest to tunnel.
- On handle side, make sure hardware does not conflict with handle movement or the seat will not slide as intended. There may be some play with the spacer but simply tighten until it is secure with no more play.
- Follow hardware order as shown in photos below -


- For seat belt installation, use the supplied hardware and secure as shown in the photos below -


- The hole on the back of the bracket nearest to the door will always use the provided spacer to adapt OEM hole to take 10mm hardware. The hole on the back of the bracket nearest to the trans tunnel always uses the seat belt adapter.

- Based on our 3D scans, overtime E30 OEM seat mounts can have slightly bent tabs, or may have not been bent perfectly to 90 degrees from factory.
- Note: You may need to bend them slightly in the case that you don't have a “perfect” fit.
Included Components
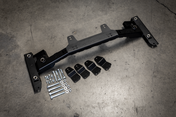
- 2x Garagistic seat brackets (flat if standard version, bent if large seat version)
- 4x M10 x 35mm bolts
- 7x M10 washers (slider side doesn't take a washer)
- 4x M10 jam nuts
- 1x seat belt adapter
- 1x stepped spacer
- 4x standoffs
Seat Fitment Ranges
Standard Adjustable E30 Seat mount settings
For seats ranging from 400mm to 425mm. (If you need to fit a bigger seat, use the Bigger seat mount product (instructions for that are below.
- Setting 1 (400mm to 405mm): Brackets on the most inner tabs. Spacer fits on the outsider side of the brackets. The hole on the back of the bracket nearest to the door will always use the provided spacer to adapt OEM hole to take 10mm hardware. The hole on the back of the bracket nearest to the trans tunnel always uses the seat belt adapter. Fits seats that are 400mm such as: Sparco Evo 1, Recaro Pole Position (403mm). If seat is smaller then 400mm, small washers/shims may be required to make seat fit perfect.


- Setting 2 (405mm to 410mm): Its basically 408mm but with tolerance is good to the range of 405mm to 410mm. Mount of the Garagistic brackets to the most inner tab of the slider side (closest to handle). Mount the other bracket on the outer side of the non slider bracket side (furthest from handle). Put spacers between the OEM tabs and the Garagistic bracket. The hole on the back of the bracket nearest to the door will always use the provided spacer to adapt OEM hole to take 10mm hardware. The hole on the back of the bracket nearest to the trans tunnel always uses the seat belt adapter. This combo fits seats like Sparco F200


- Setting 3 (420 mm-425 mm): Brackets on the most outer tabs. Use provided spacers between bracket and OEM tabs. The hole on the back of the bracket nearest to the door will always use the provided spacer to adapt OEM hole to take 10mm hardware. The hole on the back of the bracket nearest to the trans tunnel always uses the seat belt adapter. Small washers/shims may be required to make seat fit perfect.
Big seat bracket option
Adjustable seat mount option for seats in the 420mm-450mm range. Disclaimer: We are not responsible for seat fitment in the physical size of an e30. We are not saying these seats fit the car well, some may be too big for the interior of the car. We are simply listing the setting that it would take to get the seat mounted on the OEM rail using our brackets. Please do your homework on what seats fit best in an E30.
- Setting 1 (420mm to 425mm): Brackets on the most inner tabs. Bent bracket should overhang outside of OEM rail. Slots towards the back of the car, holes towards the front. Put spacer between the OEM bracket and Garagistic brackets. The hole on the back of the bracket nearest to the door will always use the provided spacer to adapt OEM hole to take 10mm hardware. The hole on the back of the bracket nearest to the trans tunnel always uses the seat belt adapter. Small washers/shims may be required to make seat fit perfect. Fits seats like Sparco Evo 2


- Setting 2 (435mm to 440mm): Its basically 408mm but with tolerance is good to the range of 405mm to 410mm. Bracket on the most inner tab of the slider side (closest to handle). Bracket on the outer side of the non slider bracket side (furthest from handle). Bent bracket should overhang outside of OEM rail. Slots towards the back of the car, holes towards the front. Put spacer between the OEM bracket and Garagistic brackets. The hole on the back of the bracket nearest to the door will always use the provided spacer to adapt OEM hole to take 10mm hardware. The hole on the back of the bracket nearest to the trans tunnel always uses the seat belt adapter. Fits seats like Sparco Evo 3 and Evo L.


- Setting 3 (445 mm-450 mm) Brackets on the most outer tabs. Bent bracket should overhang outside of OEM rail. Slots towards the back of the car, holes towards the front. Put spacer between the OEM bracket and Garagistic brackets. The hole on the back of the bracket nearest to the door will always use the provided spacer to adapt OEM hole to take 10mm hardware. The hole on the back of the bracket nearest to the trans tunnel always uses the seat belt adapter. Small washers/shims may be required to make seat fit perfect.


Common Seat Sizes

Tools Needed
-
17mm
-
13mm
-
Flat screw driver
-
Pliers
Installation Steps
Remove OEM seat. You will then need to remove OEM rails from seat.
Bolt the OEM seat rails back onto the car. (Handle will always be closest to trans tunnel. Leave everything loose to assist you in fitting everything together easier.
Look at settings above and find the dimension your seat falls under. There are 3 possible configurations so make sure you look up your seats published width before starting.
Configure Garagistic brackets in the configuration of the settings above. Leave everything loose. (Tall side of bracket should be towards the front of the car) like diagram.
Grab seat and install on mounts. Use the hardware as shown in your diagram above. Leave everything snug. Move the seat up and down until you find what is comfortable. Usually the front the of seat sits a little higher then the rear to angle you back slightly.
Once you like the seat position tighten everything. Check that seat slides back and forth smooth. If your seat doesn't move check that hardware is not touching the slider lever, everything is properly greased that nothing is misaligned.
Optional Seat Belt Mod

If you find yourself having a difficult time bending the stock seat belt receptacle to fit in the opening on your bucket seat, we've found a neat solution using OEM parts.
For this mod, you will need a spare dual seat belt receptacle from the rear seat. If you are modifying your track car, it is common to delete the rear seat which leaves you with a spare dual seat belt receptacle. If you want to do this mod to both front seats, you will need to source another dual receptacle for the passenger side front seat.
The photo below shows a stock dual seat belt receptacle (left) and our modified version (right).

As you can probably tell, this is a very straight forward modification that just requires some cutting.
Cut along the dashed line as shown in the photo below -


That's it!
Now enjoy your more flexible front seatbelt receptacle


