A large part of an effective swap is to properly organize it. By performing as many activities as possible with the convenience of the engine out allows you to save time, money, and get on the road faster. Allow me to show you how to do that.
9.2 ENGINE BAY
Power Steering – Using the existing E30 Steering Rack, this is a direct swap. Ensure that your 3 lines are clean of debris and all hardware is accounted for, including banjo bolts/washers &
Coolant – Refer to the coolant section to get all hoses ready, including worm gear clamps.
Carbon Canister – Check to make sure that the large 3” gear clamp is free and clamping the canister down. Connect all body-side plumbing. The wiring to the carbon canister will be on the engine harness.
Fuel – There are 2 fuel lines in the engine bay. Your top 2 are your fuel lines and the lower one is the carbon canister line.
Brakes – The booster remains unmodified, but the air vacuum line hooks up to the intake manifold of the M60. Ensure that you have an extra gear clamp ready to install on the intake.
Radiator Bracketry – Modify the bracketry as indicated in the radiator section.
Modify Firewall – As shown in clearances
9.3 M60 DRIVETRAIN
Engine Harness – Here you can tape, label, clean the engine wiring harness so that it hooks up seemingly when you install the engine.
o Don’t forget about the starter + Bat Wire This is important.
o It is recommended to duct tape a rag around the shifter parts to prevent it from getting caught up when installing the engine.
Transmission – Ensure that the transmission is bolted tight to the engine block. All shifter parts are accounted for, before having been shortened. It is recommended to duct tape a rag around the shifter parts to prevent it from getting caught up when installing the engine.
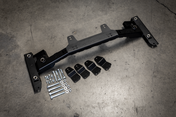
Motor Mounts/Brackets – Install the Garagistic motor mount brackets on the Engine tightly.
o Install the motor mounts themselves on the E30 Chassis.


